 Pin It
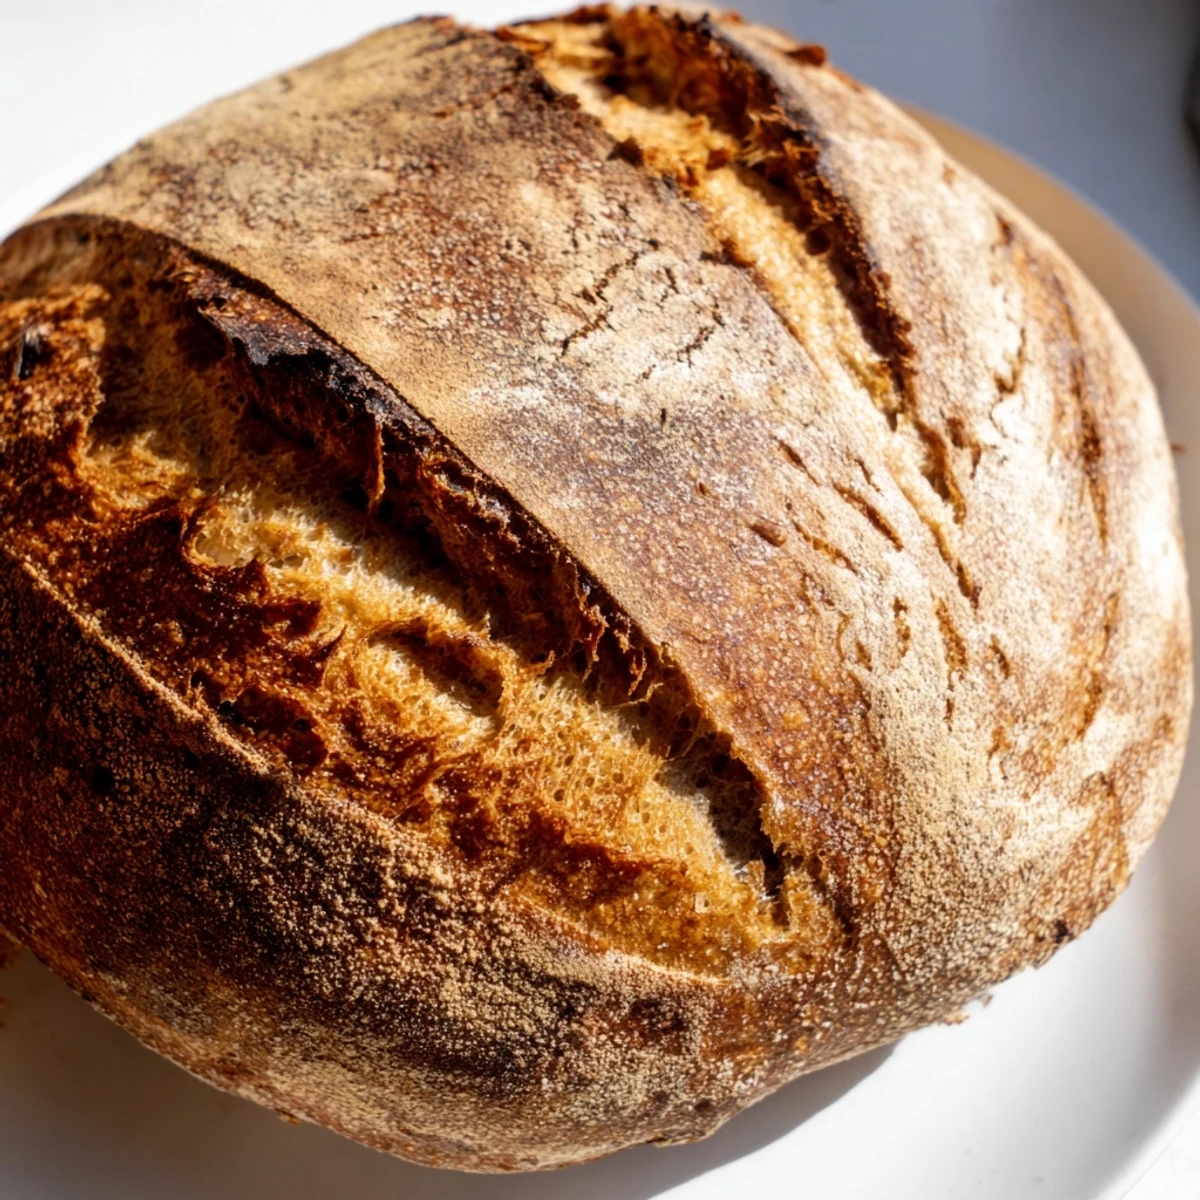
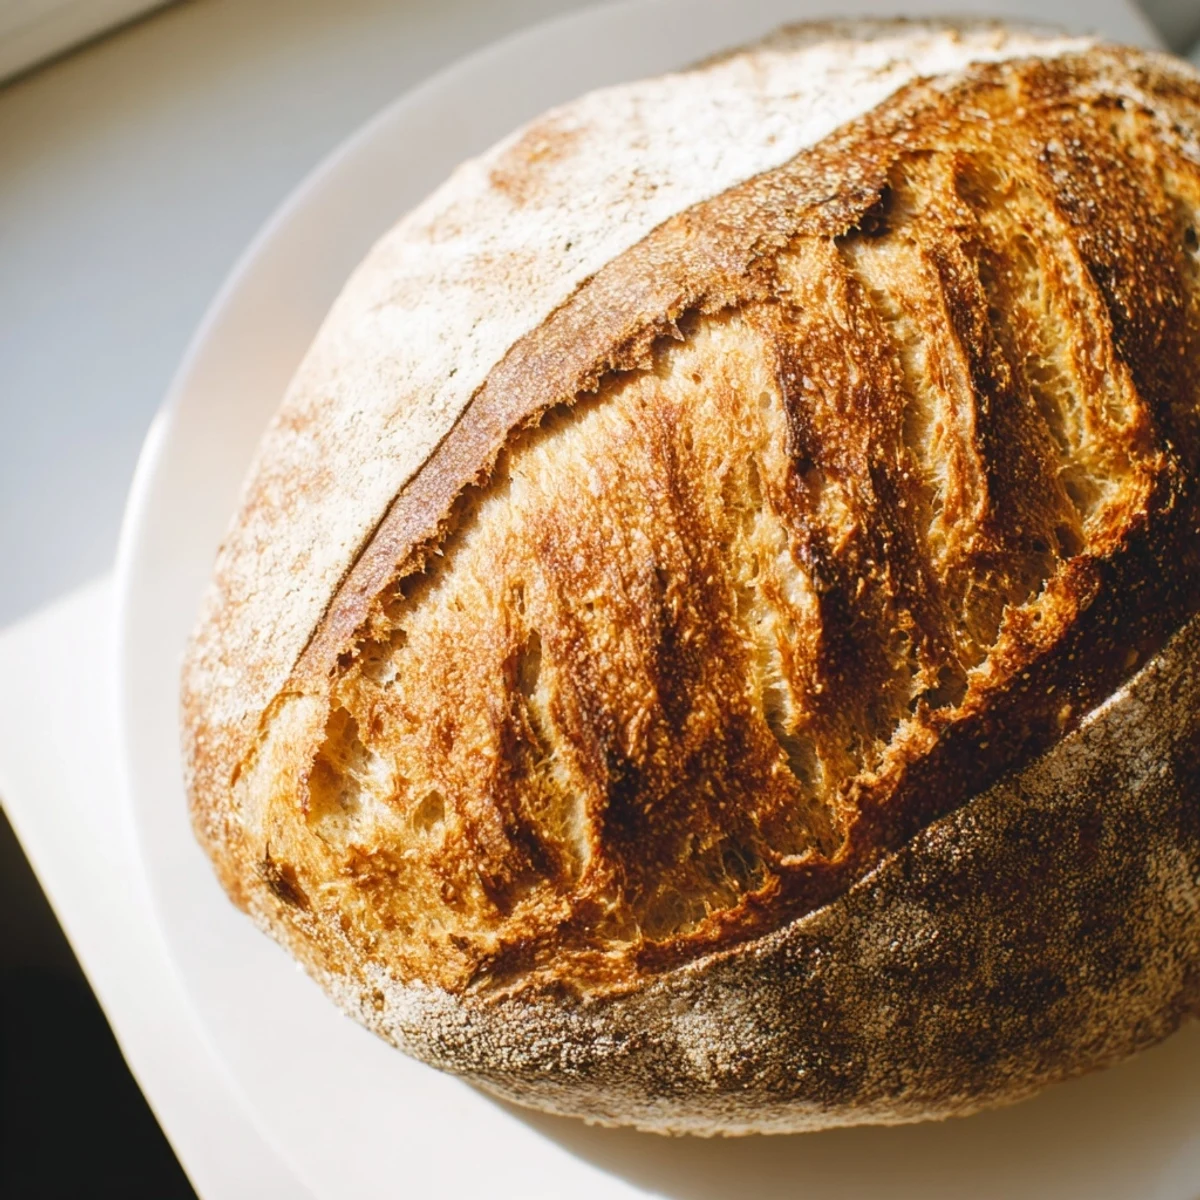
 This traditional sourdough delivers exceptional flavor through wild yeast fermentation, creating a signature tangy taste and airy texture. The process involves mixing bread flour with active starter, followed by strategic stretch-and-fold techniques that develop strength and structure. After room temperature rising, cold fermentation enhances complexity while making scheduling flexible. Baking in a preheated Dutch oven generates steam, ensuring that coveted crackling crust and tender interior. The result is a beautifully caramelized loaf with professional bakery qualities, ready for slicing after proper cooling.
My sourdough journey began during a rainy winter when the entire apartment smelled of fermenting flour and anticipation. Theres something almost magical about transforming just flour and water into a living, bubbling starter that becomes the heart of your bread. That first loaf came out of the oven with a mediocre crust, but the flavor hooked me completely. Now I keep a jar of starter on my counter like a beloved pet.
Last spring I baked three loaves for a small dinner party, timing everything perfectly so the bread emerged from the oven just as guests arrived. The sound of that crackling crust as it cooled on the rack made everyone gather around the kitchen like it was a campfire. We tore into it while still warm, butter melting into the crumb, and I watched normally reserved friends become positively reverent about carbohydrates.
Ingredients
- Bread flour: Higher protein content than all purpose gives better structure and chew to your final loaf
- Water: Room temperature works best for encouraging fermentation without shocking your starter
- Sourdough starter: The soul of your bread, should be bubbly and fed within the last 12 hours for maximum activity
- Fine sea salt: Enhances flavor and strengthens gluten structure without the metallic taste of table salt
- Rice flour for dusting: Creates a nonstick surface on your proofing basket and adds professional looking detail
Instructions
- Mix the dough base:
- Combine bread flour and water in a large bowl, mixing until no dry flour remains. Cover and let rest for one hour to hydrate fully.
- Incorporate starter and salt:
- Add your active sourdough starter and sea salt to the bowl. Mix thoroughly until the dough becomes cohesive and stretches when pulled.
- Build strength through folding:
- Perform stretch and folds every thirty minutes for two hours. Grab one edge of dough, pull it upward, and fold it over the center, rotating the bowl each time.
- Let the dough rise:
- Cover the bowl and let ferment at room temperature for four to six hours. The dough should roughly double in size and show bubbles on the surface.
- Shape your loaf:
- Turn dough onto a lightly floured surface and shape into a tight round. Use your bench scraper to create tension on the surface.
- Cold proof overnight:
- Place shaped dough seam side up in a floured proofing basket. Cover and refrigerate for eight to twelve hours.
- Preheat your oven:
- Heat oven to 230°C (450°F) with your Dutch oven inside. This initial blast of heat creates oven spring.
- Score and bake:
- Gently invert dough onto parchment, score with a sharp blade, and transfer to hot Dutch oven. Bake covered for twenty minutes.
- Develop the crust:
- Remove the lid and bake another twenty minutes until deep golden brown. The crust should sound hollow when tapped.
- Cool completely:
- Let bread cool on a wire rack for at least one hour. Slicing while warm will sacrifice the perfect crumb structure.
 Pin It
 This recipe has become my weekend meditation, a slow practice that teaches patience and rewards attention to detail. Each loaf tells the story of its making, the weather that day, the precise moment I shaped it. There is profound satisfaction in slicing into bread you created from essentially nothing but time and care.
Understanding Your Starter
Your sourdough starter is a living culture of wild yeast and beneficial bacteria. Feed it equal parts flour and water by weight at least once a week, more often if you bake frequently. A healthy starter smells pleasantly tangy, doubles within four hours of feeding, and passes the float test.
Temperature Matters
Cold fermentation develops flavor while warm temperatures speed up fermentation. In summer your dough might proof in four hours, but winter could require six or more. Learn to read the dough rather than watching the clock.
Getting That Professional Crust
The Dutch oven method creates a steamy environment that allows the bread to expand fully before the crust sets. For an extra glossy finish, brush the loaf with water or an egg wash before baking. The deep golden color comes from the natural sugars in the flour caramelizing.
- Rotate your Dutch oven halfway through baking for even color
- Let the bread cool completely before storing in a paper bag
- Revive day old bread by sprinkling with water and reheating at 180°C
 Pin It
 There is nothing quite like warm homemade sourdough with good butter and maybe a little sea salt. Happy baking.
Common Questions
- → What makes sourdough different from regular bread?
-
Sourdough relies on wild yeast and beneficial bacteria naturally present in flour rather than commercial yeast. This creates distinct tangy flavors, improves digestibility, and produces longer-lasting loaves with superior texture and keeping qualities.
- → How do I know when my starter is active enough?
-
An active starter doubles in size within 4-8 hours after feeding, displays numerous bubbles throughout, has a pleasant slightly sour aroma, and floats when dropped in water. Consistent regular feeding maintains peak activity levels.
- → Can I skip the cold fermentation step?
-
While possible, cold fermentation develops deeper flavors and creates convenient scheduling flexibility. The dough can proof 2-3 hours at room temperature instead, though the final taste will be less complex with milder tanginess.
- → Why use a Dutch oven for baking?
-
The preheated Dutch oven traps steam from the dough, creating a humid environment that promotes optimal oven spring. This results in higher rise, thinner crust, and professional bakery-style appearance without requiring elaborate steam injection systems.
- → How should I store finished sourdough?
-
Store completely cooled loaves in a paper bag or bread box at room temperature for up to 3 days. Avoid plastic bags which make the crust soft. For longer storage, slice and freeze individual portions, thawing as needed.
- → What if I don't have a proofing basket?
-
A bowl lined with a well-floured clean kitchen towel works effectively as a substitute. The flour coating prevents sticking while the towel provides structure during the final proof, though dedicated baskets create more attractive patterns.
