 Pin It
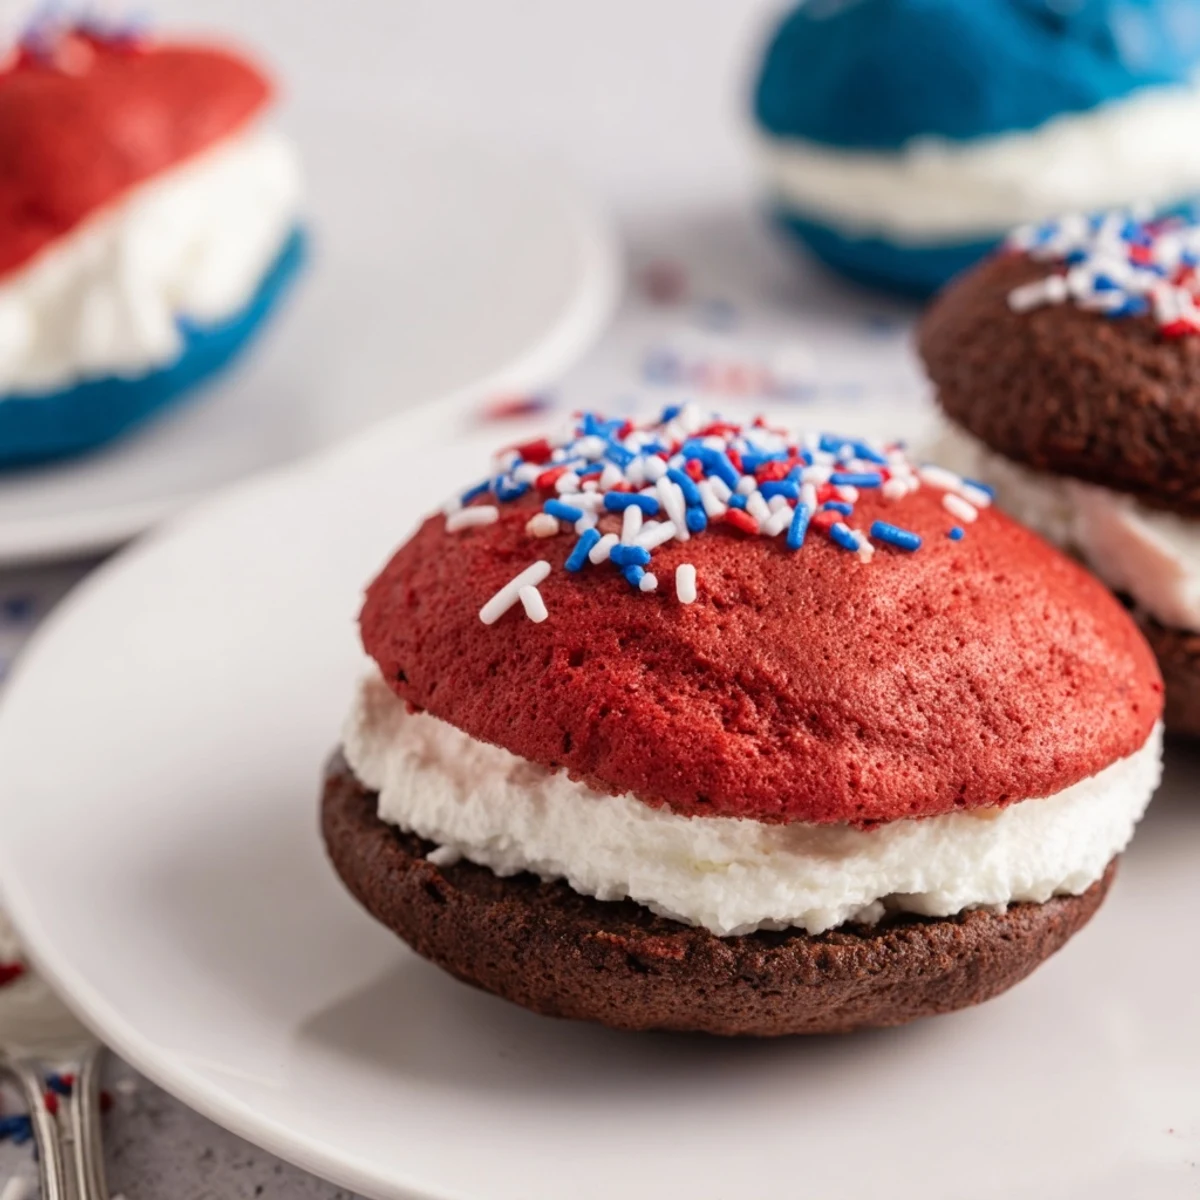
 These patriotic whoopie pies start with cocoa-scented cake rounds baked until springy, cooled, then sandwiched with a light marshmallow buttercream. Divide the filling and tint with red and blue gel colors, pipe between pairs, and roll the edges in sprinkles. Quick to prepare: mix, bake 10-12 minutes, assemble and chill briefly for firmer handling before serving.
The smell of cocoa drifting from the oven always stirs up a bit of excitement, but there's something extra giddy about making these whoopie pies the night before a big July celebration. While I prepped the bright fillings, fireworks tests popped in the distance and made me laugh at myself for jumping. The counters were soon dotted with little bowls of red, white, and blue, and my hands bore food coloring streaks—like I’d cheered alongside the decorations. These cakes never fail to bring a sense of occasion, no matter the weather outside.
The first time I made these was for a last-minute picnic, my niece piping victory stripes on each with a grin that wouldn’t quit. Flour dusted the backs of our hands, and laughter mingled with the crackle of summer lawn chairs outside. There’s a sense of play here—no perfection required, just a little bit of mess and a lot of shared smiles. Now every holiday, someone always asks for "those colorful cookie sandwiches."
Ingredients
- All-purpose flour: Essential for the classic cake texture, and sifting helps avoid lumps for a smooth batter.
- Unsweetened cocoa powder: Choose a rich, dark powder for that true chocolatey kick—stir it in well to avoid streaks.
- Baking soda: Gives rise and fluffiness, so double check the freshness before adding.
- Salt: Balances sweetness and boosts the cocoa flavor; a light hand makes it just right.
- Granulated sugar: Not just for sweetness—it also helps create those slightly crisped cake edges we love.
- Unsalted butter: Allow it to come to room temperature for easy, even mixing in both the cake and frosting.
- Large egg: Binds everything together and gives the cakes their tender crumb.
- Buttermilk: The secret to that subtle tang and beautifully soft texture—stir before measuring if it’s separated.
- Vanilla extract: Rounds out all the flavors in both cake and filling; use pure extract for best taste.
- Powdered sugar: Sifts to fluffiness in the filling, helping create that light-as-air marshmallow cream.
- Marshmallow creme: The foundation of the filling’s sweet, sticky magic—it’s messy, but worth it!
- Red & blue food coloring: Gel versions give you that bold, festive punch without watering things down.
- Patriotic sprinkles: All about making the edges sparkle, so don’t be shy and roll them on for a party finish.
- Piping bags or utensils: You can use a spoon, but piping makes for those satisfying, bakery-style swirls.
Instructions
- Prep that oven and pans:
- Line two baking sheets with parchment and set the temperature to 350F. Grab your mixing bowls—you'll be glad for working space once the batter's flying.
- Mix dry ingredients:
- Whisk together your flour, cocoa, baking soda, and salt with a light hand. Inhale the cocoa—just a hint of that scent means it's fresh.
- Cream butter and sugar:
- Beat the butter and sugar until they're fluffy and pale, an arm workout and a promise of a delicate crumb. Crack in the egg and watch it turn silky.
- Combine wet and dry:
- Alternating between buttermilk and dry mix, fold together until the batter is smooth and glossy. Don’t overmix, or you’ll miss out on that pillow-soft cake!
- Scoop and bake:
- Drop spoonfuls onto the baking sheets and give them room to breathe—bake until set and puffy, about 10 to 12 minutes. Cool completely on a rack; warm cakes will melt your filling.
- Make the filling:
- Whip butter until creamy, then blend in powdered sugar, marshmallow creme, vanilla, and just a pinch of salt. It’ll look soft at first—just keep beating till fluffy clouds appear.
- Color and fill:
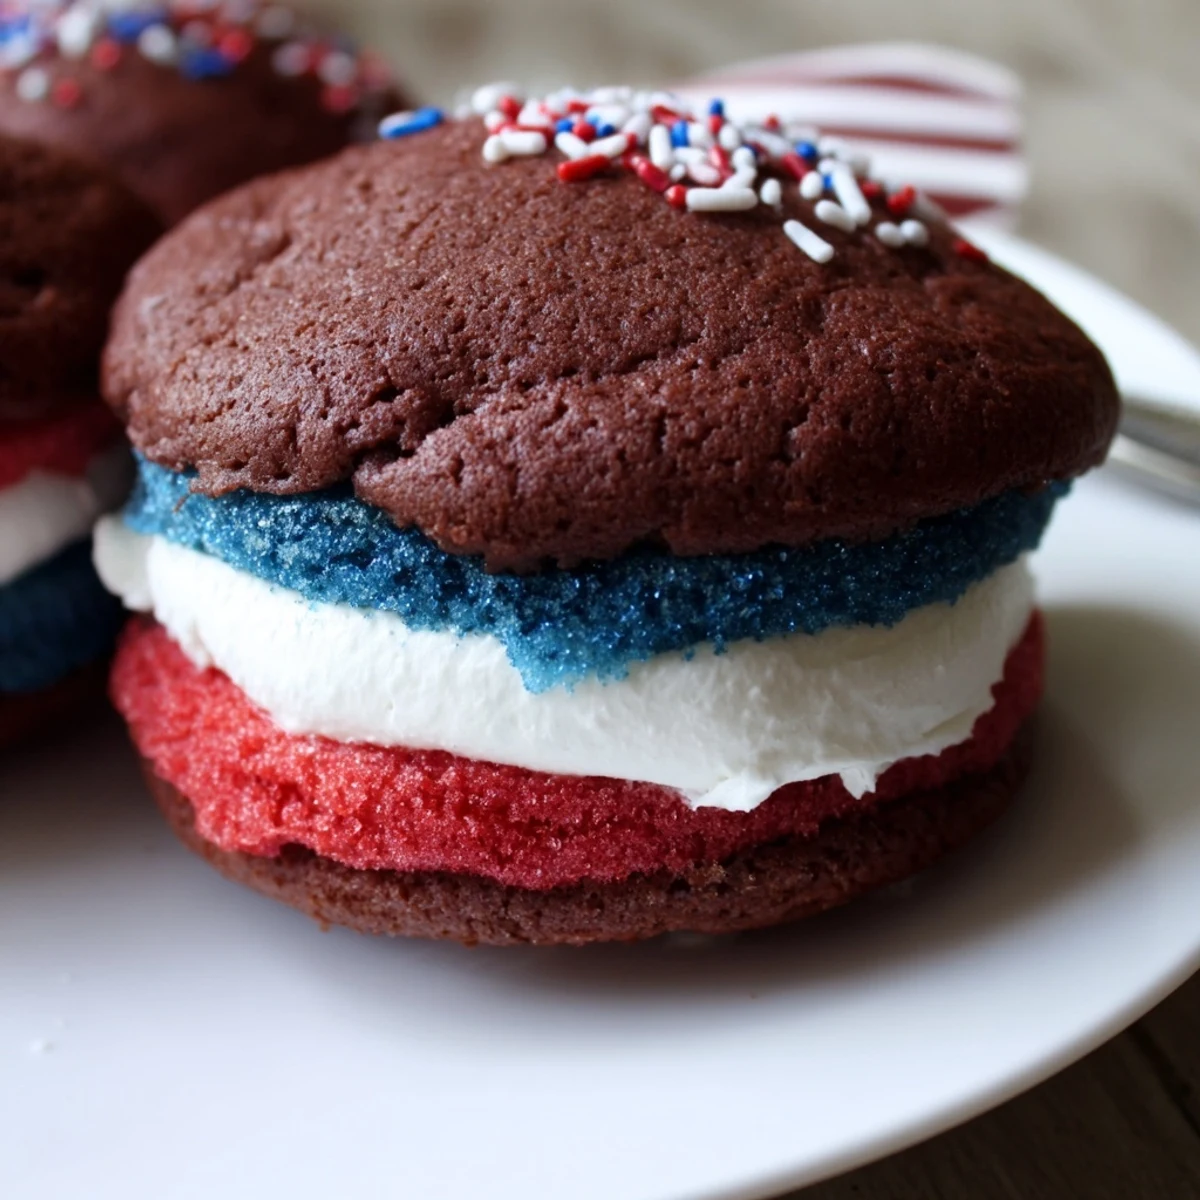
- Divide the filling into three bowls; leave one plain, tint another red, and the last blue. Each color brings its own cheer, streaks and all.
- Assemble whoopie pies:
- Pipe or spoon generous dollops of filling onto the back of half the cakes, then press another cake on top. Some will ooze out—that’s half the fun!
- Decorate:
- Roll the edges in patriotic sprinkles, or go wild and pipe extra color on top. Let them chill if you can resist; it makes stacking and serving much easier.
 Pin It
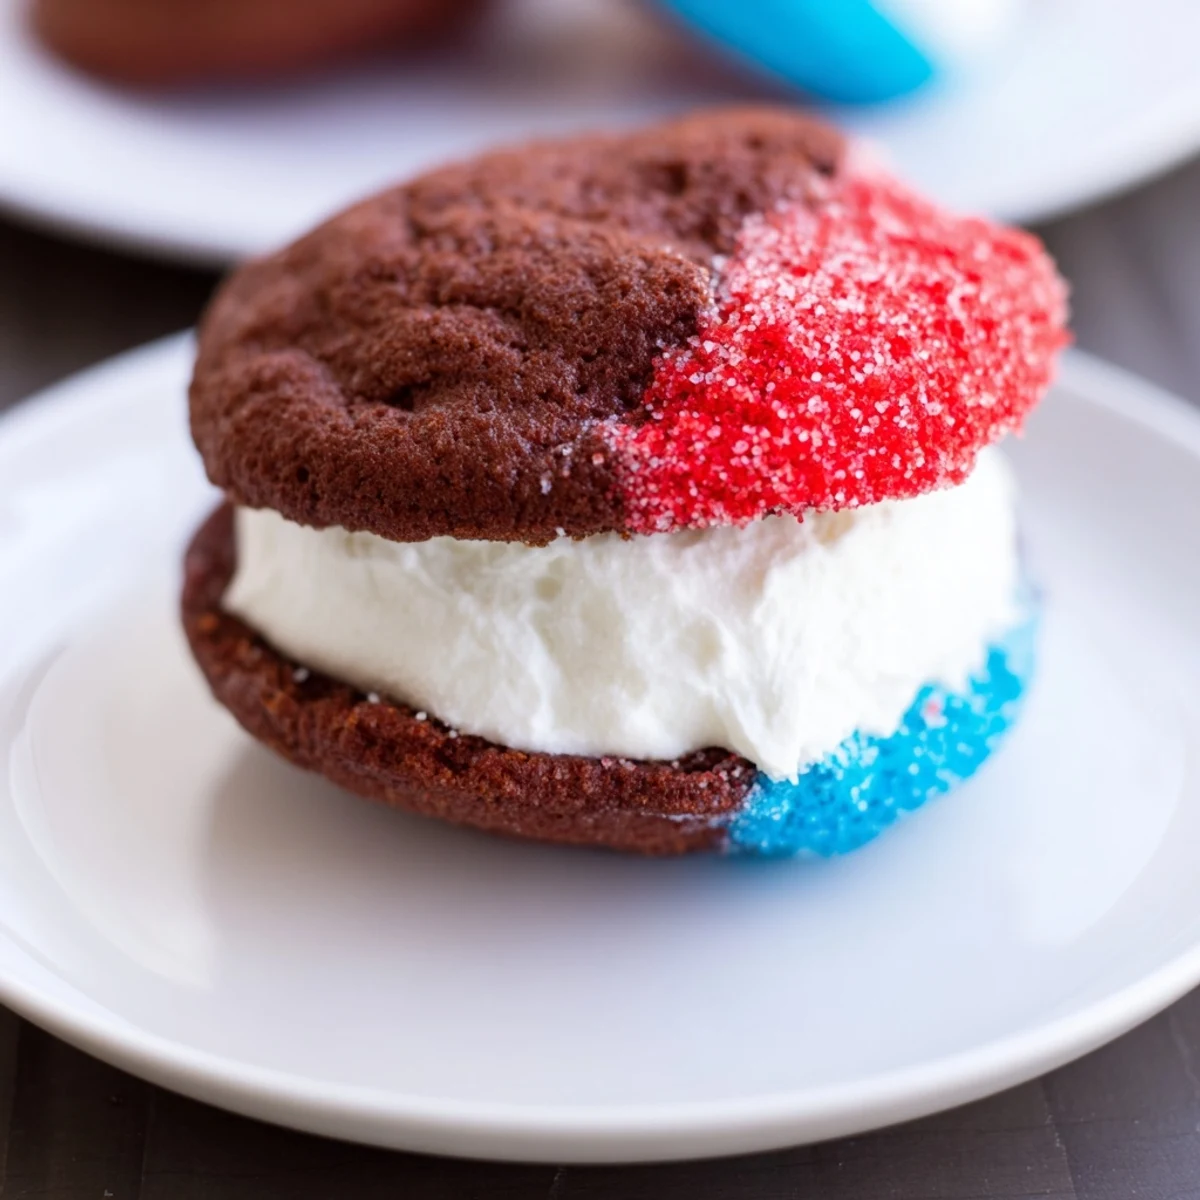
 One balmy evening, the whoopie pies disappeared almost as soon as they hit the picnic table—half the fun was watching adults trade stories as kids picked their favorite filling colors. These pies have an uncanny way of drawing everyone together, no matter who you are or how you celebrate.
Adding Your Own Festive Touch
Every batch tends to take on a personality of its own—sometimes the stripes are tidier, other times the sprinkles end up everywhere (including the dog). Trying different piping tips can change the whole look, and a friendly competition over who can make the wildest combo never fails to break the ice.
Ideal Make-Ahead Dessert
The whoopie pies keep well chilled, making them perfect to prep a day before your party. I often stack them in a container lined with parchment between each layer, so the colors stay bright and the filling firm. If you assemble them ahead, you’ll find that the flavors meld into an even more delicious treat, almost like magic.
Last-Minute Tricks for Showstopping Results
Even if the kitchen’s buzzing and you’re low on time, quick tweaks can make your whoopie pies party-ready: a swift roll in extra sprinkles or a pop of colored filling on top brings it all together. The last thing to fret about is perfect circles—these pies charm with their homemade shapes. For a bigger crowd, you can double the batch easily without much extra fuss.
- If sprinkles drop everywhere, just scoop them up and roll again.
- Stack pies with parchment for easy serving outdoors or on-the-go.
- Remember: Slightly chilling the pies gives the filling time to set and prevents smushing in transit.
 Pin It
 These whoopie pies go fast, but the cheerful spirit they bring lingers long after the last sprinkle’s found. Here’s to making your own sweet, colorful memories—no special occasion needed.
Common Questions
- → How do I know when the cake rounds are done?
-
Bake at 350°F for about 10–12 minutes. They should be set around the edges and spring back gently when touched; a few seconds longer gives a firmer texture for sandwiching.
- → What's the best way to tint the filling vibrant red and blue?
-
Use gel or paste food coloring for concentrated hues without thinning the filling. Start with small amounts, mix thoroughly, and adjust until the desired shade is reached.
- → Can I make these gluten-free?
-
Yes. Swap in a 1:1 gluten-free flour blend and briefly check batter consistency—some blends absorb more liquid and may need a touch more buttermilk for the right texture.
- → How should I store assembled whoopie pies?
-
Place in an airtight container and chill up to 3 days. For longer storage, freeze unfilled cakes for up to a month and assemble after thawing to preserve texture.
- → What can I use instead of marshmallow creme?
-
Stabilized whipped cream, homemade marshmallow fluff, or a vanilla buttercream variation can replace marshmallow creme for different textures and stability.
- → Any tips for neat assembly and decoration?
-
Cool cakes completely, chill briefly for firmer handling, pipe filling with a round tip for even coverage, press halves gently, and roll edges in sprinkles for a clean finish.
