 Pin It
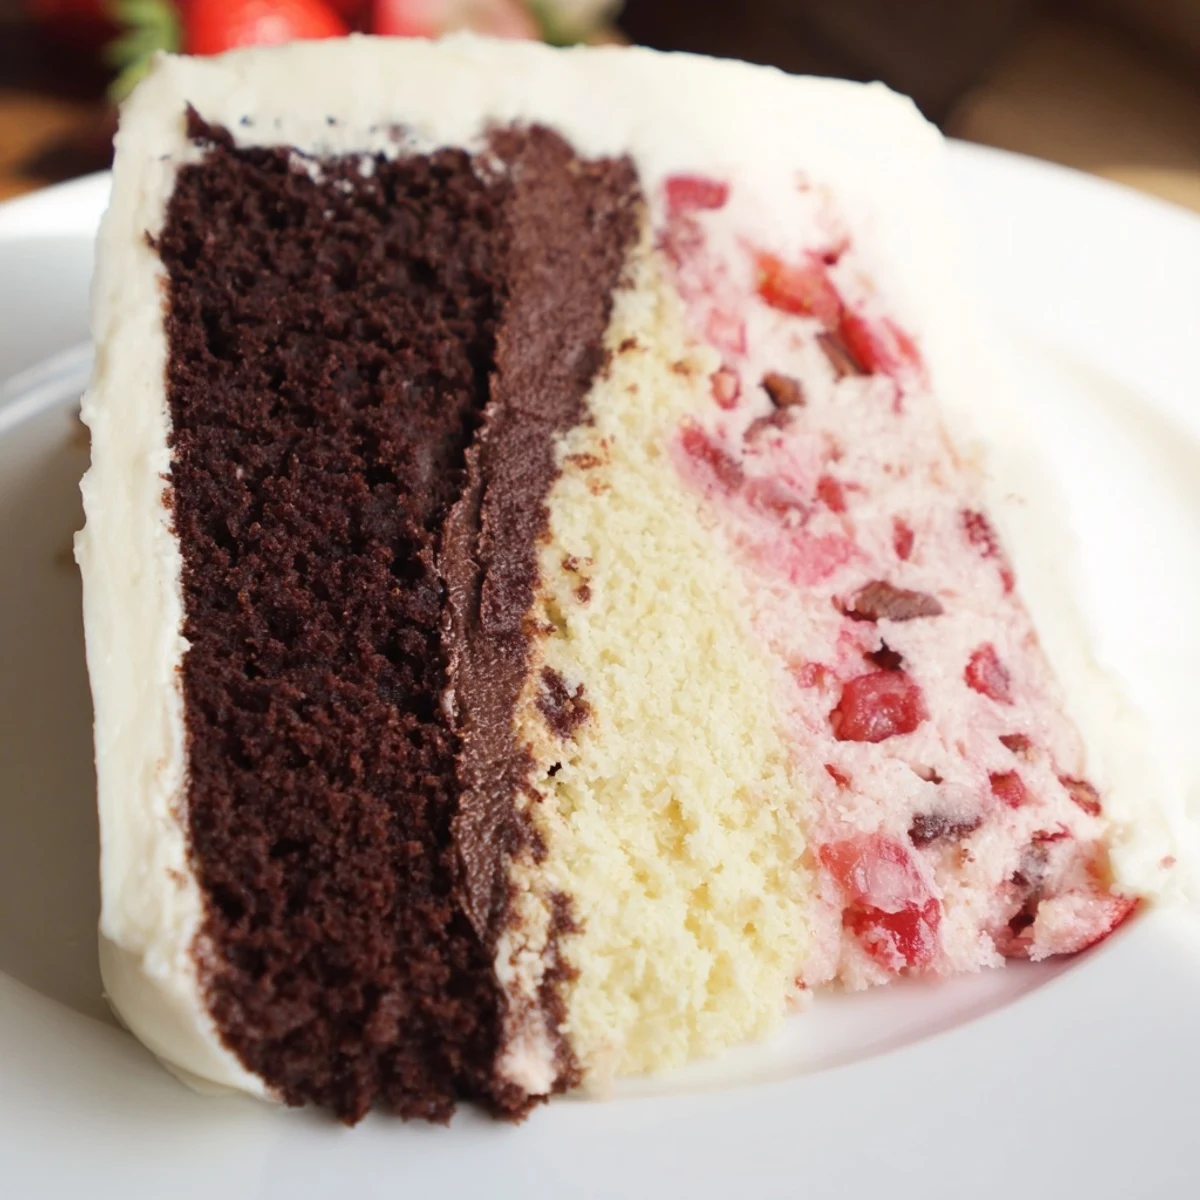
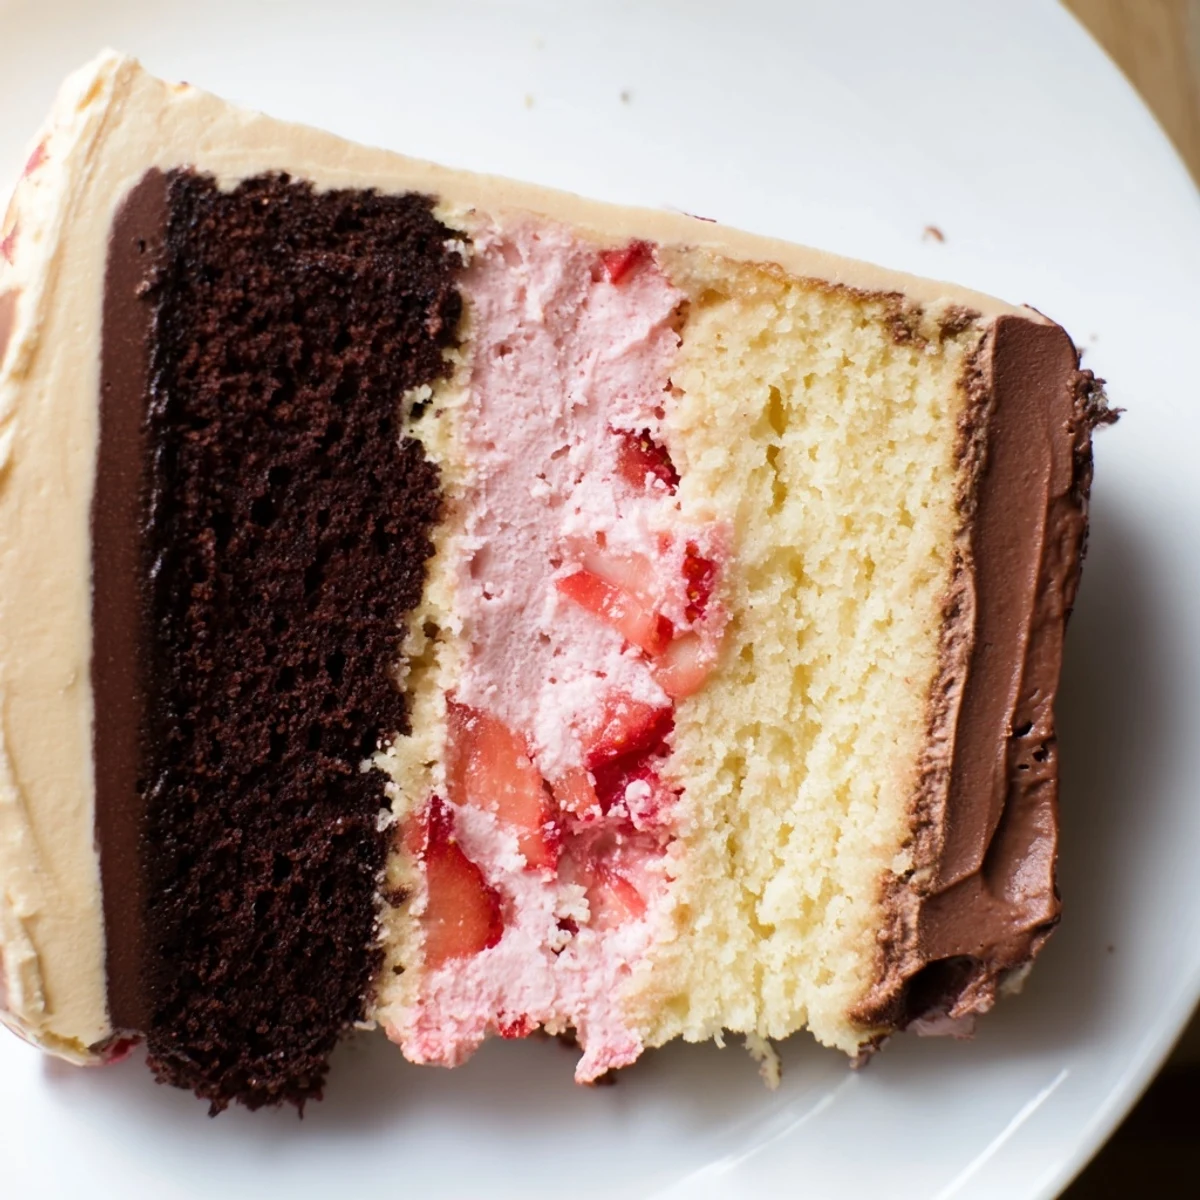
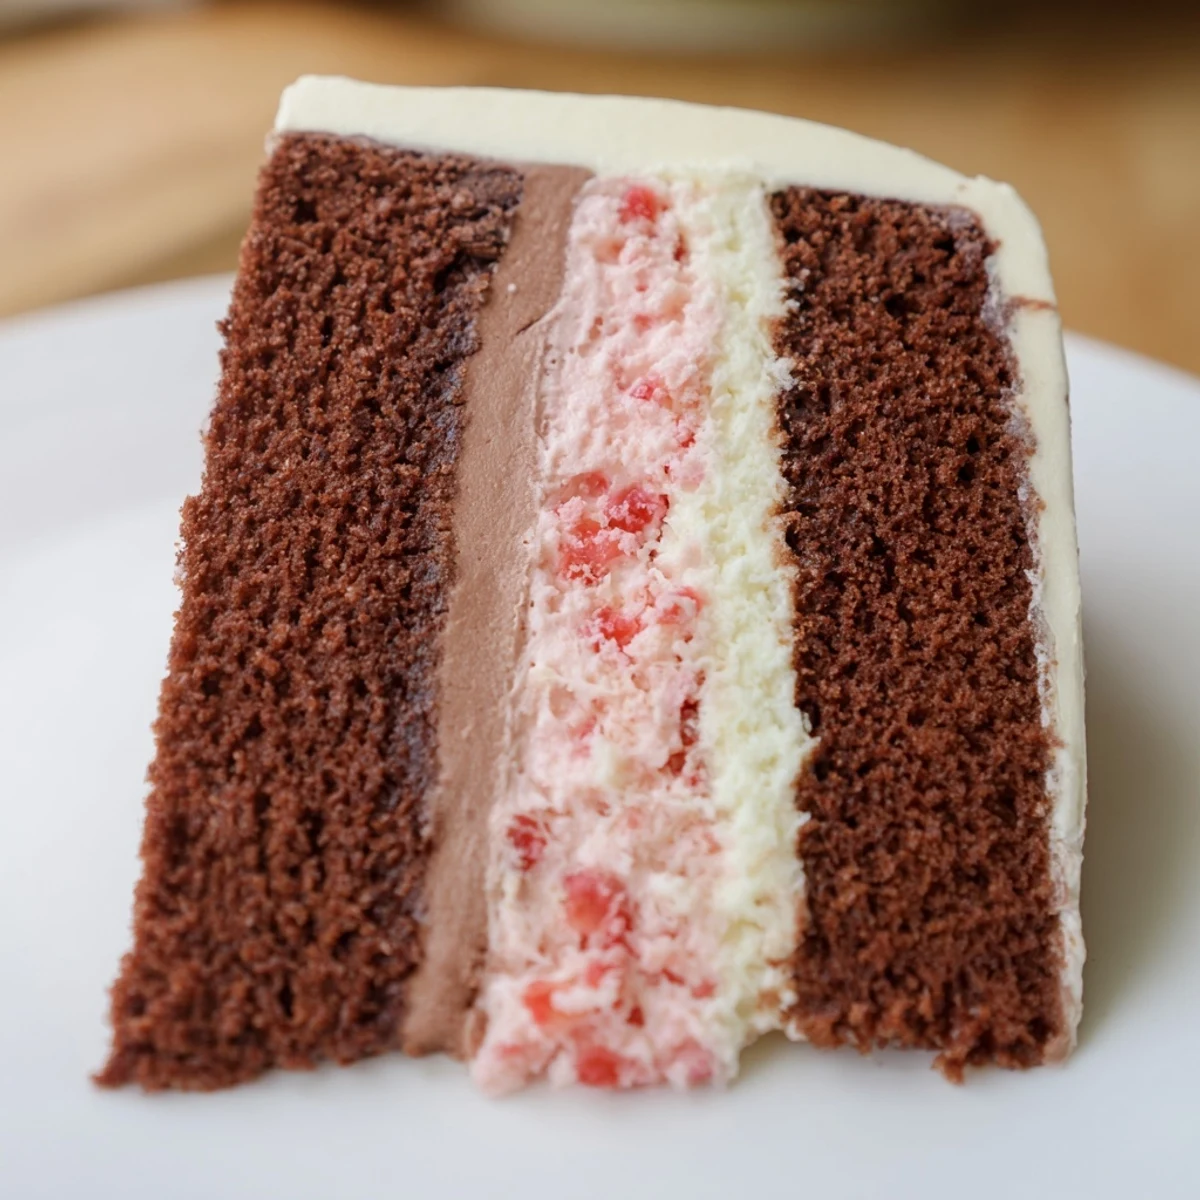
 This impressive triple-layer dessert captures the classic combination of chocolate, vanilla, and strawberry in one stunning cake. Each moist layer is baked separately then stacked with generous amounts of creamy buttercream frosting between them. The iconic pink, brown, and white stripes make this a showstopping centerpiece for birthdays, holidays, or any special occasion.
The batter starts as a classic vanilla base, then gets divided and enhanced with cocoa powder for the chocolate tier and fresh strawberries or puree for the strawberry layer. A crumb coat technique ensures smooth, professional-looking results, while the buttercream frosting adds richness and holds everything together beautifully.
The smell of this cake baking takes me back to my grandmother's kitchen where she'd let us lick the spoons while she hummed along to the radio. Something about those three distinct colors together felt like magic, and honestly, it still does.
I made this for my daughter's birthday last spring and she practically gasped when she saw the layers. The way the colors peek through the frosting cuts makes it feel like a celebration before anyone even takes a bite.
Ingredients
- All-purpose flour: The foundation that gives each layer structure while staying tender
- Baking powder and baking soda: Work together to create those perfect risen layers that aren't too dense
- Unsalted butter: Room temperature butter is non-negotiable for proper aeration and flavor
- Granulated sugar: Sweetens while creating that tender crumb structure we all want
- Large eggs: Bind everything together and add richness to each bite
- Vanilla extract: The backbone flavor that makes everything taste like home
- Whole milk: Adds moisture and creates a softer, more delicate crumb
- Unsweetened cocoa powder: Gives the chocolate layer its deep, intense flavor without making it too heavy
- Fresh strawberries or puree: Real strawberry flavor comes through best when you use actual fruit
- Powdered sugar: Sifting is worth the extra minute for silky smooth buttercream every time
- Heavy cream or milk: Adjusts the frosting consistency to make it spreadable and light
Instructions
- Get your oven ready:
- Preheat to 350°F (175°C) and prepare three 8-inch round pans with grease and parchment paper so nothing sticks.
- Whisk your dry ingredients:
- Combine flour, baking powder, baking soda, and salt in a medium bowl, then set it aside while you work on the wet ingredients.
- Cream the butter and sugar:
- Beat them together until the mixture turns pale and fluffy, which usually takes about 3-5 minutes of patient mixing.
- Add the eggs and vanilla:
- Drop in eggs one at a time, letting each fully incorporate before adding the next, then pour in your vanilla extract.
- Combine wet and dry:
- Alternate adding the flour mixture and milk, starting and ending with flour, mixing only until everything just comes together.
- Divide into three bowls:
- Split your batter equally so each flavor layer has the same amount to work with.
- Make the chocolate batter:
- Whisk cocoa powder with milk until smooth, then gently fold it into one portion of batter until no streaks remain.
- Prepare the strawberry layer:
- Fold chopped strawberries or puree into the second bowl, adding extract and food coloring if you want that classic pink hue.
- Keep vanilla as is:
- The third portion needs nothing extra, just the base batter you already made.
- Bake the layers:
- Pour each batter into its prepared pan, smooth the tops, and bake for 25-30 minutes until a toothpick comes out clean.
- Cool completely:
- Let the cakes rest in their pans for 10 minutes before moving them to a wire rack to cool entirely.
- Make the buttercream:
- Beat butter until creamy, gradually incorporate sifted powdered sugar and salt, then add vanilla and cream until fluffy.
- Assemble with care:
- Layer chocolate first with buttercream, then strawberry, then vanilla, spreading frosting between each.
- Add the crumb coat:
- Cover the entire cake in a thin layer of frosting and chill for 30 minutes to lock in those crumbs.
- Final frost and decorate:
- Spread the remaining buttercream over the chilled cake and add sprinkles, strawberries, or chocolate shavings if desired.
 Pin It
 My cousin asked for the recipe after taking one bite at our family reunion, saying it reminded her of the Neapolitan ice cream we used to get from the truck on summer evenings. That's exactly the feeling I hope this cake brings to everyone who tries it.
Making Clean Layers
Chilling the cake for at least 30 minutes before frosting and another 30 after the crumb coat makes all the difference between sliding layers and stable ones. I learned this the hard way when my first attempt started leaning like a tower in Pisa during a summer party.
Flavor Variations
Sometimes I swap raspberry for the strawberry layer when fresh berries are in season, and the tartness cuts through the sweet buttercream beautifully. You could also make the chocolate layer more intense by adding melted dark chocolate to that portion of batter.
Storage and Serving
This cake actually tastes better the next day when the flavors have had time to mingle and settle into each other. Store it covered at room temperature for up to three days or in the refrigerator if your kitchen runs warm.
- Cold cake slices more cleanly, so chill for 30 minutes before serving at a party
- Bring slices to room temperature for the best texture and flavor experience
- Leftovers freeze beautifully wrapped tightly for up to two months
 Pin It
 Hope this cake brings as much joy to your table as it has to mine over the years. There's something about those three colors together that just makes people happy, simple as that.
Common Questions
- → How do I get clean slices when serving?
-
Chill the finished cake for at least 30 minutes before slicing. Use a sharp serrated knife and wipe it clean between cuts. Run the knife under warm water, dry thoroughly, and slice with gentle sawing motions for the cleanest results.
- → Can I make the layers ahead of time?
-
Yes, bake and cool the layers completely, then wrap each individually in plastic wrap and freeze for up to 3 months. Thaw overnight in the refrigerator before frosting and assembling. The buttercream can also be made ahead and stored in an airtight container in the refrigerator for up to a week.
- → What's the best way to divide the batter evenly?
-
Weigh your mixing bowl before adding batter, then weigh the total batter. Divide by three to get the exact weight per portion. Alternatively, use a measuring cup to portion equal amounts into each bowl, or visually divide the batter as evenly as possible—small variations won't affect the final result.
- → Can I use frozen strawberries instead of fresh?
-
Frozen strawberries work well if thawed and thoroughly drained first. Puree them and reduce the liquid slightly by simmering on the stove for a few minutes. This prevents adding excess moisture to the batter, which could affect the cake's texture.
- → Why do I need a crumb coat?
-
A crumb coat is a thin layer of frosting applied first to seal in loose crumbs. Chill the cake for 30 minutes after applying, then add the final layer of frosting. This technique ensures your finished cake has a smooth, professional appearance without visible crumbs or uneven patches.
- → Can I make this as a sheet cake instead?
-
You can bake the batter in a 9x13 inch pan, though you'll lose the distinct layered appearance. Swirl the three batters together with a knife for a marbled effect. Adjust baking time to approximately 35-40 minutes, testing for doneness with a toothpick in the center.
