 Pin It
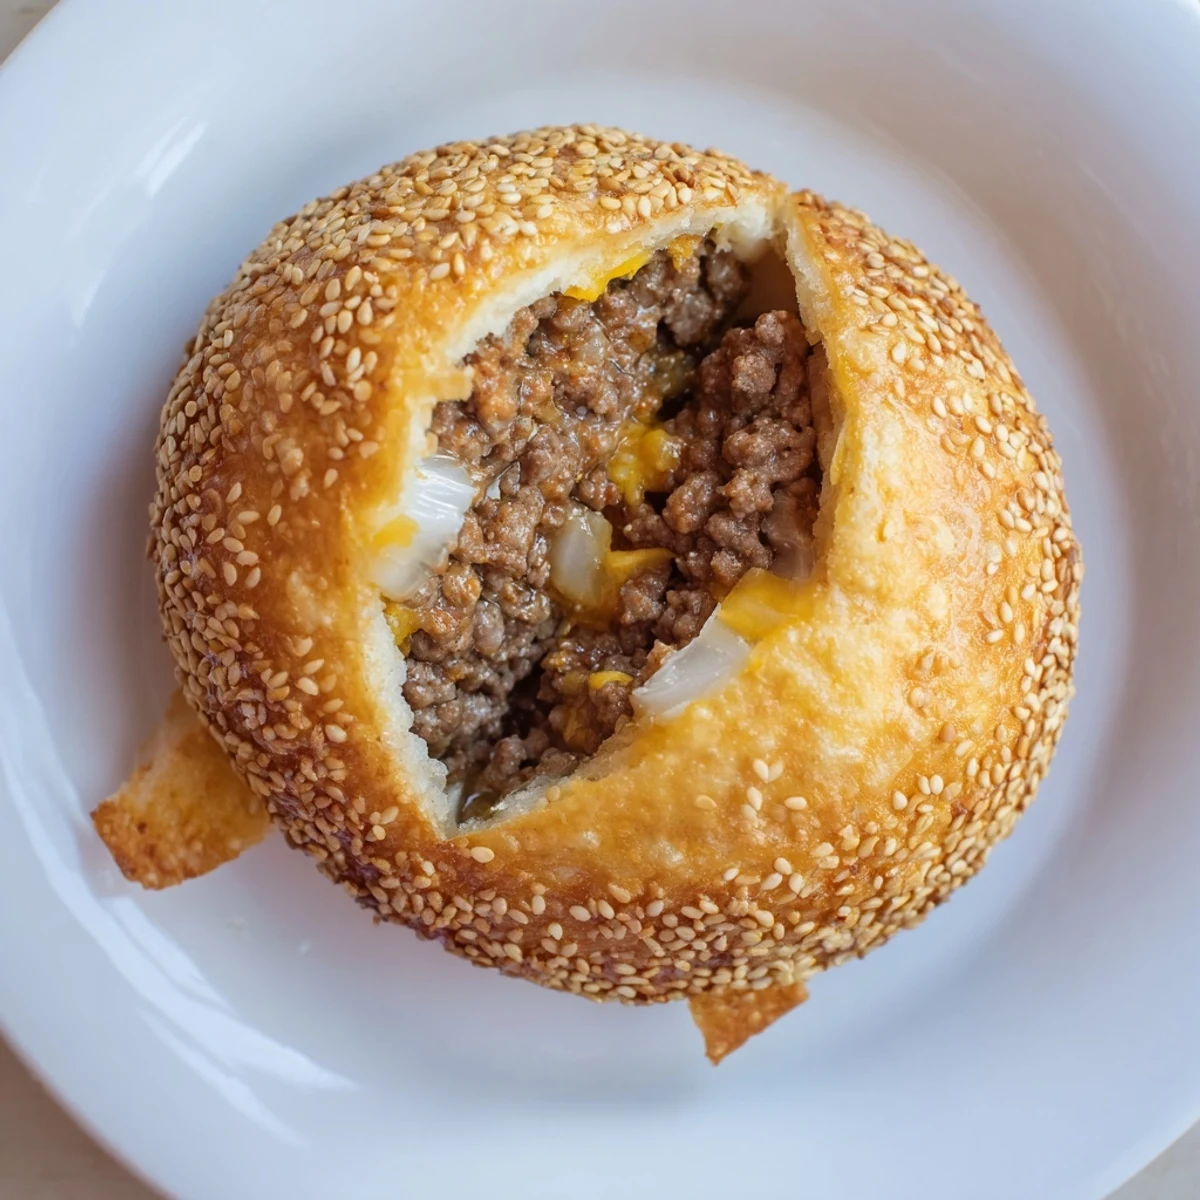
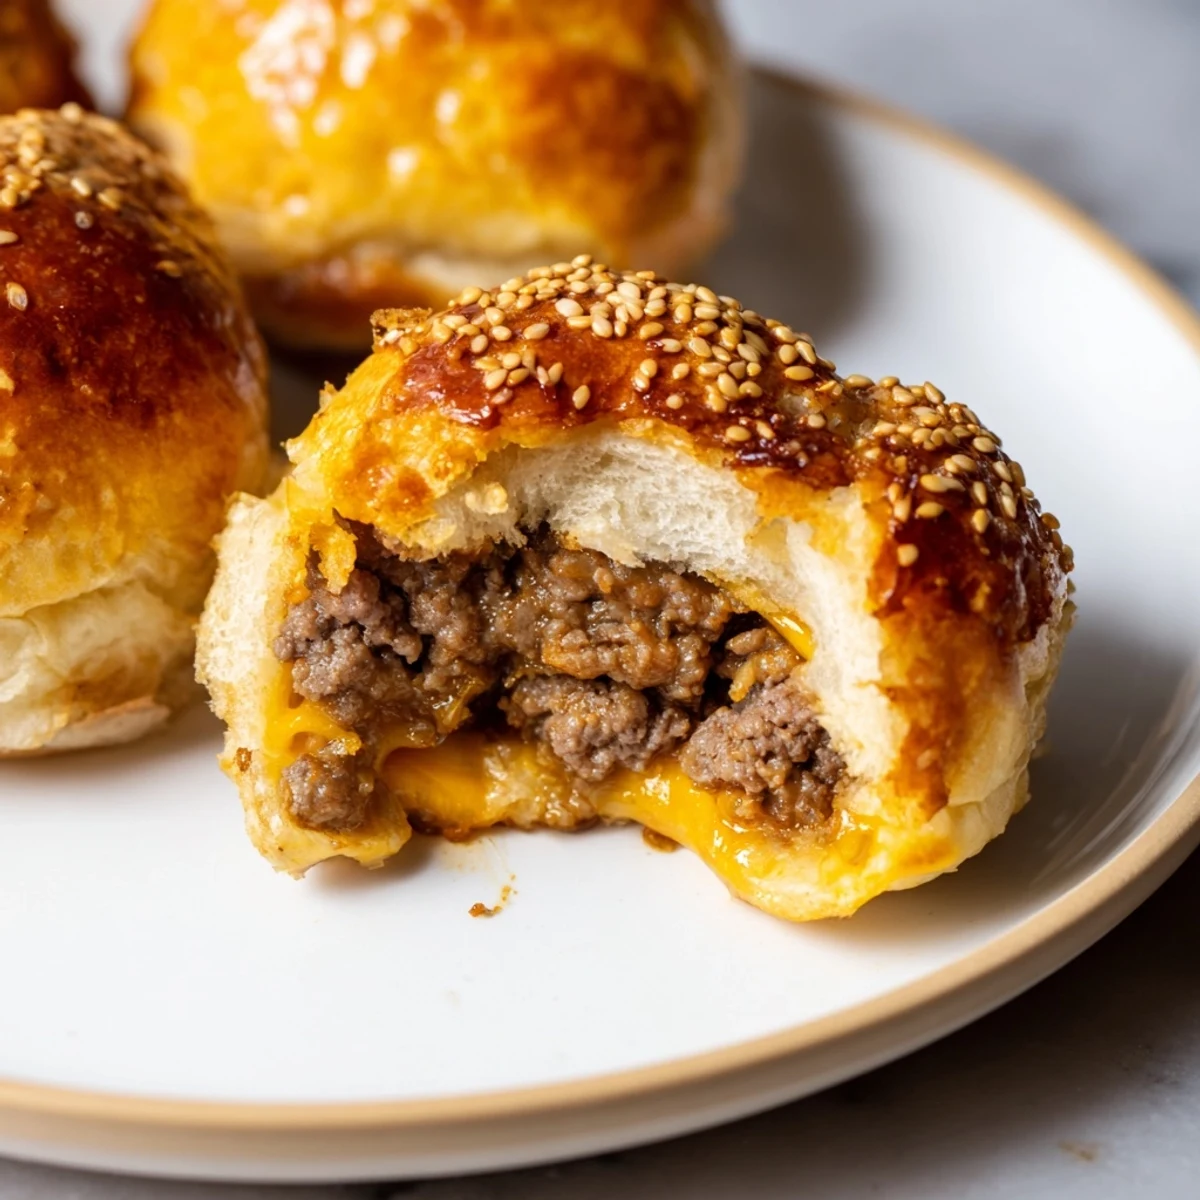
 These cheesy cheeseburger bombs are biscuit-wrapped beef balls stuffed with shredded cheddar and a mozzarella cube. Sauté onion with ground beef, season with garlic powder, ketchup, mustard and Worcestershire, cool slightly, then encase portions in flattened biscuit rounds. Brush with egg, sprinkle sesame seeds and bake at 200°C until golden. Serve warm with burger sauces.
The first sizzle of onions meeting the skillet always jolts my appetite, but making these Cheesy Cheeseburger Bombs was a whole new level of fun in the kitchen. The anticipation grew with each buttery biscuit stuffed and sealed, cheesy cubes tucked like little secrets inside. It’s one of those recipes I stumbled into on a rainy weekend, craving innovation but unwilling to give up the comforts of a classic cheeseburger. The results were pure, gooey happiness—unexpectedly bold and gloriously messy.
The first time I served these for my friends during game night, I got more questions about the smell from the oven than about the game itself. We ended up abandoning the score sheets for plates piled with these beefy, cheesy bundles. It was the accidental main event—and nobody ever let me bring a plain burger again. That’s when I realized just how much these bombs could steal the show.
Ingredients
- Ground beef: Look for beef with a little fat—it keeps the filling juicy and flavorful; draining excess fat after browning keeps the bombs from getting soggy.
- Shredded cheddar cheese: Sharp cheddar melts like a dream, and a fresh block shredded by hand brings the biggest punch of flavor.
- Mozzarella cubes: These add the gooey surprise in the center—press them gently into the meat pile so they don’t escape during baking.
- Onion: Cooking it just until translucent creates a sweet base without overpowering the beef.
- Pickle: Optional, but the briny pop balances the richness (I sometimes double it in mine for that bite).
- Refrigerated biscuit dough: These ready-to-bake biscuits make things fast and foolproof; stretch them wide so there’s enough to encase all the fillings.
- Ketchup and yellow mustard: Mixing these into the beef infuses that classic burger tang in every bite.
- Worcestershire sauce: Just a splash brings umami that ties everything together.
- Garlic powder, salt, and pepper: Basics that round out the meat’s flavor—sprinkled in directly with the beef early so it soaks right in.
- Egg (for egg wash): Brushing the tops gives a bakery-worthy sheen, and helps the sesame seeds stick.
- Sesame seeds: Don’t skip them—they make these bombs really taste like a cheeseburger.
Instructions
- Prepare your oven and tray:
- Heat the oven to 200°C (400°F) and line a baking sheet with parchment paper, so nothing sticks and cleanup is a breeze.
- Sizzle the onion and beef:
- Toss diced onion in a skillet set over medium heat and stir until translucent before adding the beef, garlic powder, salt, and pepper; break it up and cook until everything is browned and fragrant.
- Add the flavor boosters:
- Off the heat, stir in ketchup, mustard, Worcestershire sauce, and pickles—let the mixture rest to cool down, so it doesn’t melt the cheese too soon.
- Flatten and fill biscuits:
- Gently stretch each biscuit into a flat disc and spoon a generous tablespoon of meat mix in the center, toppled with shredded cheddar and a mozzarella cube.
- Wrap and seal:
- Pull up the dough edges, pinch tightly to seal every bit, and set seam side down on your tray—they should look like chubby dumplings.
- Brush and top:
- Whisk the egg, brush over each bomb, and dust the tops with sesame seeds for extra burger-like charm.
- Bake to perfection:
- Pop them in the oven for 15–18 minutes, watching for that deep golden color that signals crispy, buttery bliss.
- Cool and serve:
- Let them rest a few minutes before biting in, so you don’t lose any cheese or burn eager mouths; serve with extra sauce for dipping if you like.
 Pin It
 I still remember my cousin’s wide-eyed amazement when he pulled apart his first bomb at the kitchen counter—steam rising, cheese stretching and laughter echoing around us. Suddenly, the focus shifted entirely to quick hands reaching for seconds and everyone arguing over which sauce was the ultimate dip.
When the Kitchen Gets Messy
I learned quickly to use parchment paper for baking—not just to prevent sticking, but to catch all those renegade cheese bubbles. Sometimes my fingers would get sticky sealing the dough, but a bit of flour on the hands kept things under control.
Customize Your Cheeseburger Bombs
You can play with the fillings so easily: swapping in pepper jack makes it pleasantly spicy, and cooked bacon bits tucked into each one upgrade them to deluxe status. Even my pickle-averse friend admitted the little pops of brine were addictive alongside the melty cheese.
Keeping Things Easy for Next Time
I now keep a tube of biscuit dough in the fridge just for impromptu burger bomb nights—a trick that’s rescued many last-minute gatherings. The recipe forgives little slip-ups, and even imperfect shapes bake up as golden, irresistible bites.
- Don’t be afraid to use whatever cheese you have on hand.
- Try adding different sauces to your beef mix for new flavor twists.
- Always let them cool at least five minutes—trust me, your fingers and your mouth will thank you.
 Pin It
 These cheeseburger bombs are a little bite of cheer no matter the season. If you ever need something easy, shareable, and just outrageously satisfying, this recipe’s always by your side.
Common Questions
- → How do I avoid soggy bottoms?
-
Drain any excess fat after browning the beef and allow the filling to cool slightly before assembling. Use a hot oven (200°C/400°F) and bake on parchment or a lightly greased sheet for crisp bottoms. Brushing with egg wash also promotes a golden, less soggy crust.
- → Can I freeze these before baking?
-
Yes. Assemble bombs on a tray, freeze until firm, then transfer to a sealed bag. Bake from frozen, adding 5–8 minutes to the bake time and watch for a deep golden color. For best texture, avoid thawing fully before baking.
- → What cheeses work best for the filling?
-
Shredded cheddar gives sharp flavor while mozzarella provides a melty center. Pepper jack adds heat; mix cheddar and mozzarella for balance. Use cheeses with good meltability and avoid overly dry or aged varieties.
- → How can I make a gluten-free version?
-
Swap the refrigerated biscuit dough for a certified gluten-free biscuit or pastry dough. Bake times may vary slightly and the texture will be a bit different, so check for a golden exterior and warmed center before serving.
- → What's the best way to reheat leftovers?
-
Reheat in a 180°C (350°F) oven for 8–12 minutes to restore crispness and melt the cheese evenly. A microwave will warm them faster but will soften the exterior; finish briefly in the oven if time allows.
- → Can I prepare the filling in advance?
-
Yes. Cook and cool the beef mixture, then refrigerate up to 48 hours or freeze longer. Assemble just before baking for the freshest texture. Chilling the filling makes it easier to portion and seal inside the dough.
